Showing posts with label whole grain. Show all posts

26 December 2016

Don't Let Your Fears Get in Your Way (plus recipe: Spinach, Zucchini, Whole Wheat Cookies with White Chocolate)

When I started promising to make any kind of cookies requested by the missionaries who sent me letters, I fully expected that the requests would be for their favorite cookies that they missed from home. Traditional varieties, like chocolate chip, snickerdoodles, or even oatmeal raisin. But some of my favorite missionaries have taken my challenge as an opportunity to push me beyond my comfort zone - to see where my cookie-creation limits are.

My little brother, when he was serving a mission in Ireland, requested a fruitcake-inspired cookie that was such a big hit, I've been kicking myself ever since for not writing down the recipe as I went along. (These days, I almost always write down my recipe attempts, so I can recreate the cookies if they work ... or so that I know what to tweak if they don't. Because it's not often that you get to say the fruitcake was the hit of the party!) And until recently, my brother's fruitcake cookie was the most difficult recipe challenge I'd ever faced. But now, word has spread among the missionaries in the Baltimore, MD mission ... and the young men and women serving in our area have decided to try to stump me.

I have to admit, I'm really enjoying the regular letters from missionaries (some of whom I know personally, and others that I haven't actually met yet), and I have a lot of fun creating cookies to fit their wacky whims. One of the biggest challenges I've received so far was from Sister Bullock (who fit so well into our family that I still think of her as one of my adopted children, even though she transferred out of our immediate area a few months ago).
Sister Bullock, getting a bagpipes lesson when she came to our house for dinner one evening
She asked me to make cookies with zucchini, spinach, whole wheat, and white chocolate. Because she was certain that I'd never be able to do it, and she wanted to be the one who could brag about stumping me and winning my challenge.

I'll admit, I was a little bit panicky. Because I knew I could make a spinach, zucchini, whole wheat cookie with white chocolate, and I was pretty confident that I could even make one that I would enjoy. Because I usually prefer the "healthy options" in a variety of recipes. But I really didn't think I'd be able to combine all of those ingredients in a cookie that was delicious enough to tickle the tastebuds of the typical kid next door. And I don't consider my recipes a success unless those picky, won't-touch-a-vegetable taste-testers like it too.

But it worked! The cookies went quickly, and everyone agreed that I should have made a bigger batch.

Not surprisingly, those who knew the ingredient list before tasting the cookies were hesitant to try them. A lot of my taste testers had to be coaxed and coerced by those who had already taken the plunge. And a few of my regular tasters never did get the courage to try. But without exception, those who tried the cookies without first knowing what was in them came back for seconds or thirds.

Sometimes, we get so caught up in our own expectations that we miss out on the fabulous things life has waiting for us. It helps when we have friends and mentors to push us out of our comfort zones, but sometimes you just have to close our eyes and take a bite out of life. Who knows? You might find a new favorite recipe.

Whole Wheat, Spinach and Zucchini Cookies with White Chocolate Drizzle
You will need:


1/2 c. butter (softened)
2/3 c. brown sugar
2 egg whites (or 1 egg)
1 c. grated zucchini
1 tsp. baking powder
1/2 tsp. salt
1/4 c. shredded spinach
2 c. whole wheat flour (or 2 1/2 c. all-purpose flour)
3 oz. white chocolate, chopped

Place zucchini in a strainer, and press with a clean paper towel to strain liquid out, until you have only 1/2 c. zucchini. (If you don't drain the liquid, your cookies will be too mushy.)

Cream together butter and sugar, until light and fluffy. 

Beat in egg, zucchini, spinach, baking powder, and salt.

Stir in flour. Then, drop by teaspoonful onto a greased, or parchment-lined, baking sheet. Bake at 375 degrees Fahrenheit for 8-10 minutes, until lightly browned on bottom.

Transfer to a wire rack to cool. 

In a small, microwave-safe bowl, melt white chocolate (in the microwave: zap for 30 seconds, stir, then microwave for 15 seconds at a time, stirring after each, until melted). Drizzle over the top of the cooled cookies. Chill 10-15 minutes to set the chocolate, then serve.

12 December 2016

Sometimes, the Best Things Come from a Need to Adapt (plus Recipe: Lemon Snowball Cookies)

When I was preparing cookies for our very first cookie party (in December 2009), I pulled out all of my favorite recipes. Cookies I'd made for years. Tried-and-true recipes handed down from parents, in-laws, and grandparents. Especially my favorite Christmas cookie: Russian Teacakes (a melt-in-your-mouth little bite-sized cookie full of chopped pecans). But then I realized that, for an open-house party like we were planning, not knowing the allergy profiles for every guest, it wouldn't be wise to serve anything with nuts.

I decided to tweak and adapt that Russian Teacakes recipe to something a bit more allergy-safe. I decided to use the delicious lemon bars my great-grandma used to make for every family Christmas party when I was a little girl as inspiration ... and my Lemon Snowball Cookies have been the biggest hit at our cookie parties ever since!

My friend, Susie, loved the Lemon Snowball Cookies so much that the unofficial name for the recipe in our house is "Aunt Susie's Christmas Cookies." And whenever I make them for the party, I hold several dozen in reserve until she arrives, so she can be sure to get some. And recently, Susie has adopted a mostly-vegan diet, so these cookies are perfect for her, as they have no eggs and can be made with margarine or shortening instead of butter, so they're great for a vegan diet.

This year, I tweaked the recipe even more. My brain tumor has been acting up lately, and the latest development (since September) is that I'm having allergic reactions (itchy, tingly skin, swollen tongue and throat, not being able to breathe...) to almost every food I try to eat (and not being able to breathe just because you wanted to eat lunch is no fun!)

I've identified about 30 safe ingredients so far, and I try to keep my food intake to these ingredients only. The Lemon Snowball Cookies easily adapted to my new, even more restricted diet, and you can find that recipe variation at the bottom of this post.


Original Lemon Snowball Cookie Recipe:

You’ll need:
1 c. butter (or margarine or vegetable shortening)
1 c. powdered sugar (divided)
1/2 tsp. salt
2 tsp. lemon extract
2 1/4 c. flour (whole wheat gives the most full flavor, but all-purpose works almost as well)

Cream together margarine and 1/2 c. powdered sugar.

Add lemon flavoring and salt. Beat until light and fluffy.

Stir in flour.

Chill dough 3-4 hours. (If you skip this step, your cookies will not hold their shape.)

Preheat your oven to 400 degrees Fahrenheit.

Roll into balls approximately 1/2″ in diameter (I use a mini cookie scoop, but you can use your hands, if you don’t have one.)

Place dough balls on an ungreased baking sheet. Cookies don’t spread when baked (unless you forgot to chill the dough), so you can place them close together, as long as they’re not touching. I can usually fit the entire batch of cookies onto one large baking sheet.

Bake for 10-12 minutes, until cookies are set, but not browned. Cool slightly on the baking sheet, then transfer to wire rack to cool completely.

Put the remaining 1/2 c. of powdered sugar into a gallon-sized zip-top baggie. Place the cooled cookies into the bag and zip closed. Shake the bag gently to coat each cookie in powdered sugar. I’ve found that 1/2 c. sugar is just about perfect for one batch of cookies, but you can use more or less, depending upon your personal taste preferences. (recipe makes approximately 8 dozen cookies)

These delicious little bite-sized cookies are so good, you’ll probably need to make several batches, if you want enough to share!

Gluten-Free, Vegan Lemon Snowball Cookies 
You will need: 
1 c. coconut oil
1/2 c. powdered sugar (+ 1/2 c. more to roll finished cookies in)
1/2 tsp. salt
2 tsp. lemon extract
1/4 c. cornstarch
2 1/4 c. Gluten-free All-purpose flour (I used Bob's Red Mill 1 to 1 All-Purpose GF Flour)


Follow mixing & baking directions for regular Lemon Snowball Cookies (above) with the following changes:
     * Add cornstarch with the salt and lemon extract (before stirring in the flour).

     * Because the coconut oil solidifies much faster than butter or margarine when chilled, I scooped the cookie balls BEFORE chilling the dough for this version. Place dough balls on parchment-lined cookie sheet and chill in refrigerator for 1 hour or in the freezer for about 30 minutes. (If you try to chill it first, the dough may be too hard and crumbly to portion properly.) You do still need to chill the dough (AFTER rolling into balls), but only for about an hour (instead of 3-4, as needed for the original recipe).

Make-ahead instructions for both versions:
     * Freeze individually-portioned cookie dough balls on parchment-lined cookie sheets until solid (30 minutes for GF version, 4-5 hours for original version). Then, transfer to large zipper-seal freezer bags.
     * When time to bake, preheat oven to 325 degrees Fahrenheit. Bake cookies from frozen (no need to thaw!) for 12-15 minutes, until set but not browned. Cool, then roll in powdered sugar as before.

05 November 2014

Recipe: Giant Oatmeal Cookies with Red Chile

A week and a half ago, I had the pleasure of attending the SCBWI Handsprings Writers' Conference here in New Mexico. Writing conferences are one of my favorite things ever, because what could possibly be better than hanging out with a room full of people who all totally get your special brand of crazy? But this conference was extra-special, because I got to help out as part of the planning committee. Specifically, I got to be in charge of the FOOD!

So, you know me. I can't just go to Costco and buy a big tray of cookies. If I'm in charge of the food for an event, I'm going to do my best to find the perfect food for that event. So, since this was a New Mexico writers' conference, of course we had to have something with chiles in it, right? And what goes better with chiles than cookies??

Giant Oatmeal Cookies with Red Chile
For approximately 36 giant cookies, you will need:
2 c. butter or margarine*
2 c. dark brown sugar
1 c. granulated sugar
4 eggs
2 tsp. baking soda
1 tsp. salt
2 tsp. vanilla
4 c. oats
4 c. whole wheat flour (you can also use all-purpose, but whole wheat tastes better)
1/2 - 2/3 c. diced dried red chiles (these can be as mild or as spicy as you like)
1 pkg. chocolate chips (opt.)
2 c. raisins (opt.)

In a large mixing bowl, cream together butter and sugars. Add eggs, baking soda, salt and vanilla, and beat until creamy. Stir in oats. Add the flour, 1 cup at a time, beating well after each addition.Mix in chiles, chocolate chips and raisins, if desired. Preheat oven to 350 degrees Fahrenheit. Using an ice cream scoop**, portion the dough onto an ungreased cookie sheet, leaving a few inches of space around each cookie, so they don't run together when they expand. (I fit 8 cookies on my large half-sheet pan. A normal cookie sheet would probably fit 6 cookies.) Bake for 12-13 minutes, until bottom edges are slightly golden brown. Remove from cookie sheet and cool on a wire rack.

*note: You want the butter to be slightly softened to make it cream together with the sugars well, but if butter is too soft, the cookies will end up being super-flat when you bake them. I recommend taking the butter out of the fridge approximately 10-15 minutes before assembling the cookie dough, so it will soften slightly but not too much. If your cookies are coming out flat, consider chilling your dough for an hour or two in the fridge before baking.

**note: You can make regular-sized cookies instead of giant cookies, if so desired. Simply use a regular cookie scoop (or tablespoon) to dish cookie dough and bake at 375 degrees Fahrenheit for 9 minutes instead.

19 August 2014

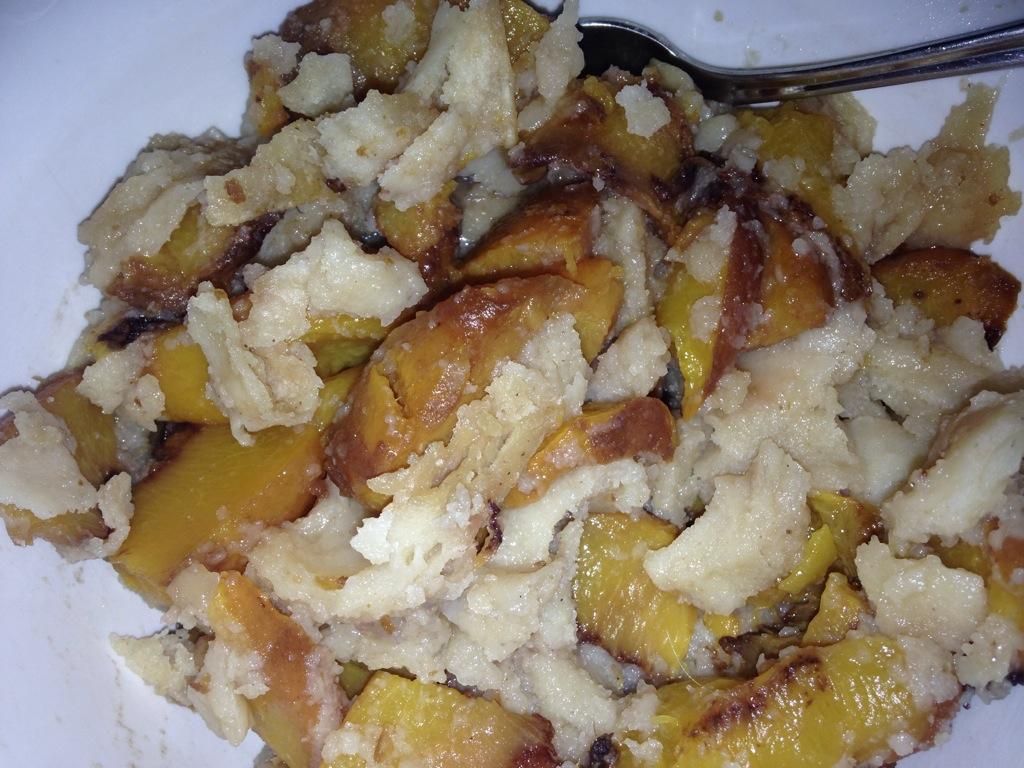
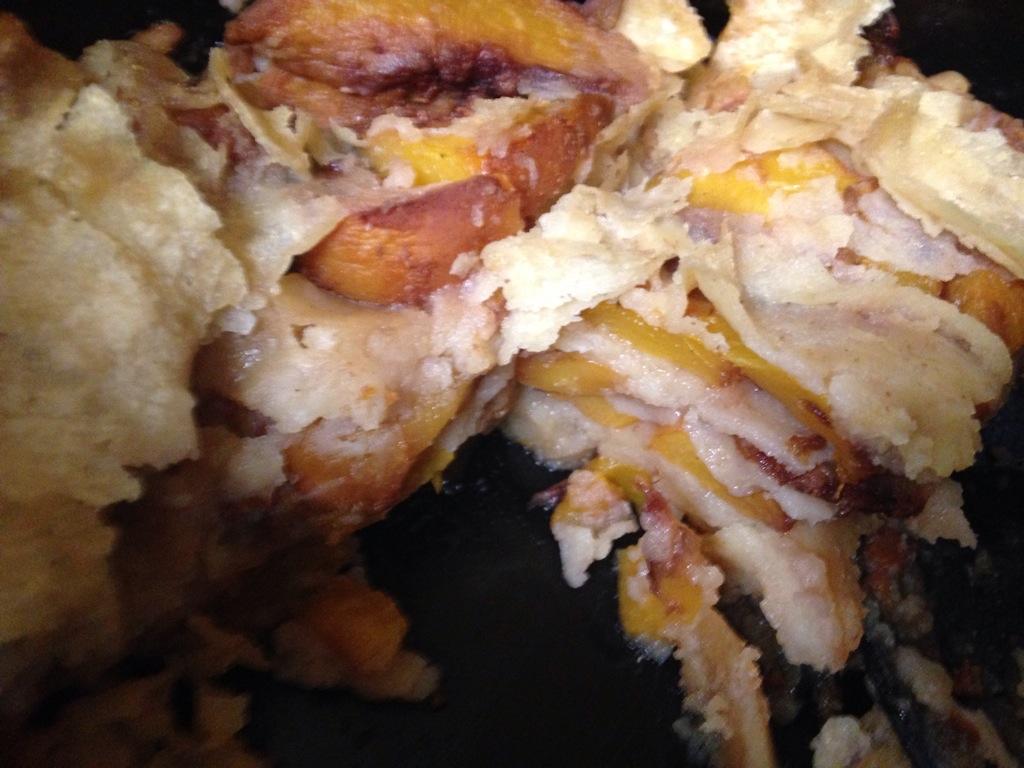
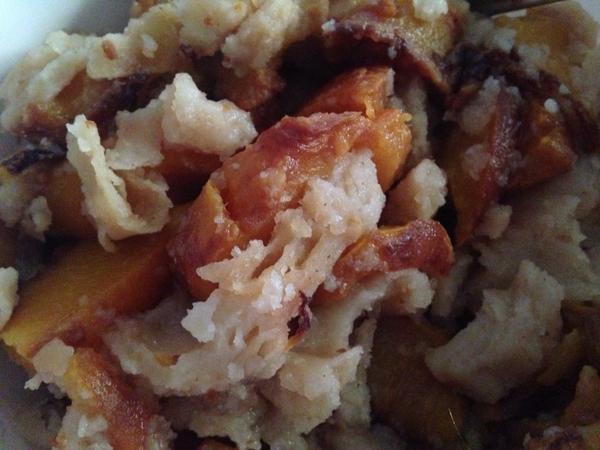
Crock Pot Gourmet Recipe: 3-Ingredient, Gluten-Free Peach Cobbler

This time of year, I prefer a lighter, mostly vegetarian diet (meat and heavy starches weigh me down in the hotter months, and I just feel sluggish), but my family misses the comfort foods and treats we often enjoy in the winter. So when my friend gave me a big batch of slightly-squishy peaches, I decided to try a lighter twist on peach cobbler. With only 3 ingredients in the Crock Pot, it's super-simple to put together, and just as delicious as "the real thing!"

For a batch that fills a 5-quart Crock Pot, you will need:
* 12-16 corn tortillas (3-4 per layer)
* approximately 2 dozen peaches, pitted and sliced (perfect use for the peaches that are starting to get over-ripe, or you could probably use canned peaches, drained)
* 1/2 to 1 c. brown sugar, divided (if using canned peaches, you may want to use even less sugar)

Spray crock with non-stick cooking oil. Spread 1/4 of the sliced peaches in a layer on the bottom of the Crock Pot. Top with 3-4 tortillas. (I prefer to use 3 tortillas. If you position them like in the picture below, you can tear the middle one in half to cover the outside edges of the layer, avoiding a 4-way overlap, and a very thick layer of tortilla, in the center of the dish.)
Sprinkle with 1/4 of the brown sugar (I used approximately 3/4 c. total, but you can use more or less depending upon how sweet your peaches are, and how sweet you want the final cobbler to be).

Repeat layers 4 times, ending with a sprinkling of brown sugar.

Cook on low for 5-6 hours (or overnight if you want a delicious breakfast to wake up to!)

Serve warm or cold, either by itself, or with your favorite whipped cream / plain yogurt / ice cream.

This recipe is naturally gluten-free and vegan!

11 July 2014

Crock Pot Gourmet: Giant Pancake

Several weeks ago, Jessica Sinsheimer tweeted this link with instructions on how to make a giant pancake cake in an electric rice cooker. I don't own an electric rice cooker,* but I've made similar cakes in my Crock Pot, so I promised to share the recipe on my blog. It's been a crazy-busy summer, and I have so many half-written blog posts piling up, but I'm finally getting around to actually posting the promised recipe!

Crock Pot Giant Pancake

3 3/4 c. whole wheat flour
1 c. old fashioned oats
3 Tbsp. baking powder
1 tsp. salt
1 c. powdered milk**
1/3 c. oil
4 eggs
3 1/2 c. water**

In a large bowl, stir together flour, oats, baking powder, salt and powdered milk.

Make a well in the center of the dry ingredients, and add oil, eggs and 1 c. water. Beat together the liquid ingredients slightly (to break the egg yolks), and then slowly expand your stirring strokes to begin stirring dry ingredients into the wet, drizzling in remaining water as you stir. (Adding all of the water at once makes it difficult to incorporate the egg properly, but you don't want to mix the batter too much, or you'll get tough pancakes, so don't be too slow about adding the water. If you don't want to worry about overmixing, you can beat the eggs, oil and water all together in a separate bowl and dump it all in at once, then stir just until the dry ingredients are moistened. I just prefer the one-bowl method, because I hate washing dishes!)

Spray your 5-quart*** Crock Pot with non-stick cooking spray, coating the sides and bottom evenly.

Pour batter into the crock, make sure the lid is skewed slightly to let steam escape, and cook on low for 2 1/2 to 3 hours, until a knife inserted into the center of the cake comes out clean. (Cooking times may vary depending upon your Crock Pot's settings.)
You can either cut and serve the cake directly from the Crock Pot (my preferred method, because it creates less dishes to wash), or you can flip the cake out onto a large tray or cookie sheet to slice and serve.
 Serve plain, or topped with your favorite syrup or fruit topping.
 For a slightly more savory dish (the pancake itself isn't too sweet to begin with), you can drizzle with melted peanut butter (or almond or cashew butter or Nutella - Okay, so the Nutella wouldn't make it savory).


*I also make rice in my slow cooker. No need to buy multiple devices when one is so good at multitasking!

** I prefer to use powdered milk in cooking, because it's less expensive, you don't notice a taste difference in cooked products, and I can add a little extra calcium to my recipes by adding more milk powder than you would normally add for that amount of reconstituted milk. But if you don't want to use powdered milk, you can omit the powdered milk and simply use 3 1/2 c. fluid milk instead of water.

*** You can make a smaller batch in a 3-quart Crock Pot. Just cut all ingredient quantities in half. It will most likely cook faster as well, so start checking on it after 1 3/4 to 2 hours.

VARIATIONS:
   -- Stir 1 c. dried cranberries in with the dry ingredients, and add 1 1/2 tsp. orange extract with the liquid ingredients. Before pouring batter into the Crock Pot, sprinkle 1/2 c. brown sugar into the bottom of the crock. If desired, you may also sprinkle 1/4 c. brown sugar on the top of the batter.
    -- Stir 1/2 c. cocoa powder in with the dry ingredients, and add 1/2 c. honey with the liquids for a sweeter treat.
    -- Use your imagination! What are your favorite pancake stir-ins? Add them to the batter before baking. (Leave a comment below to tell me your favorites!)